
Quick Start
Your first export takes under a minute. Here's the whole workflow.
Step 1: Open a Blueprint
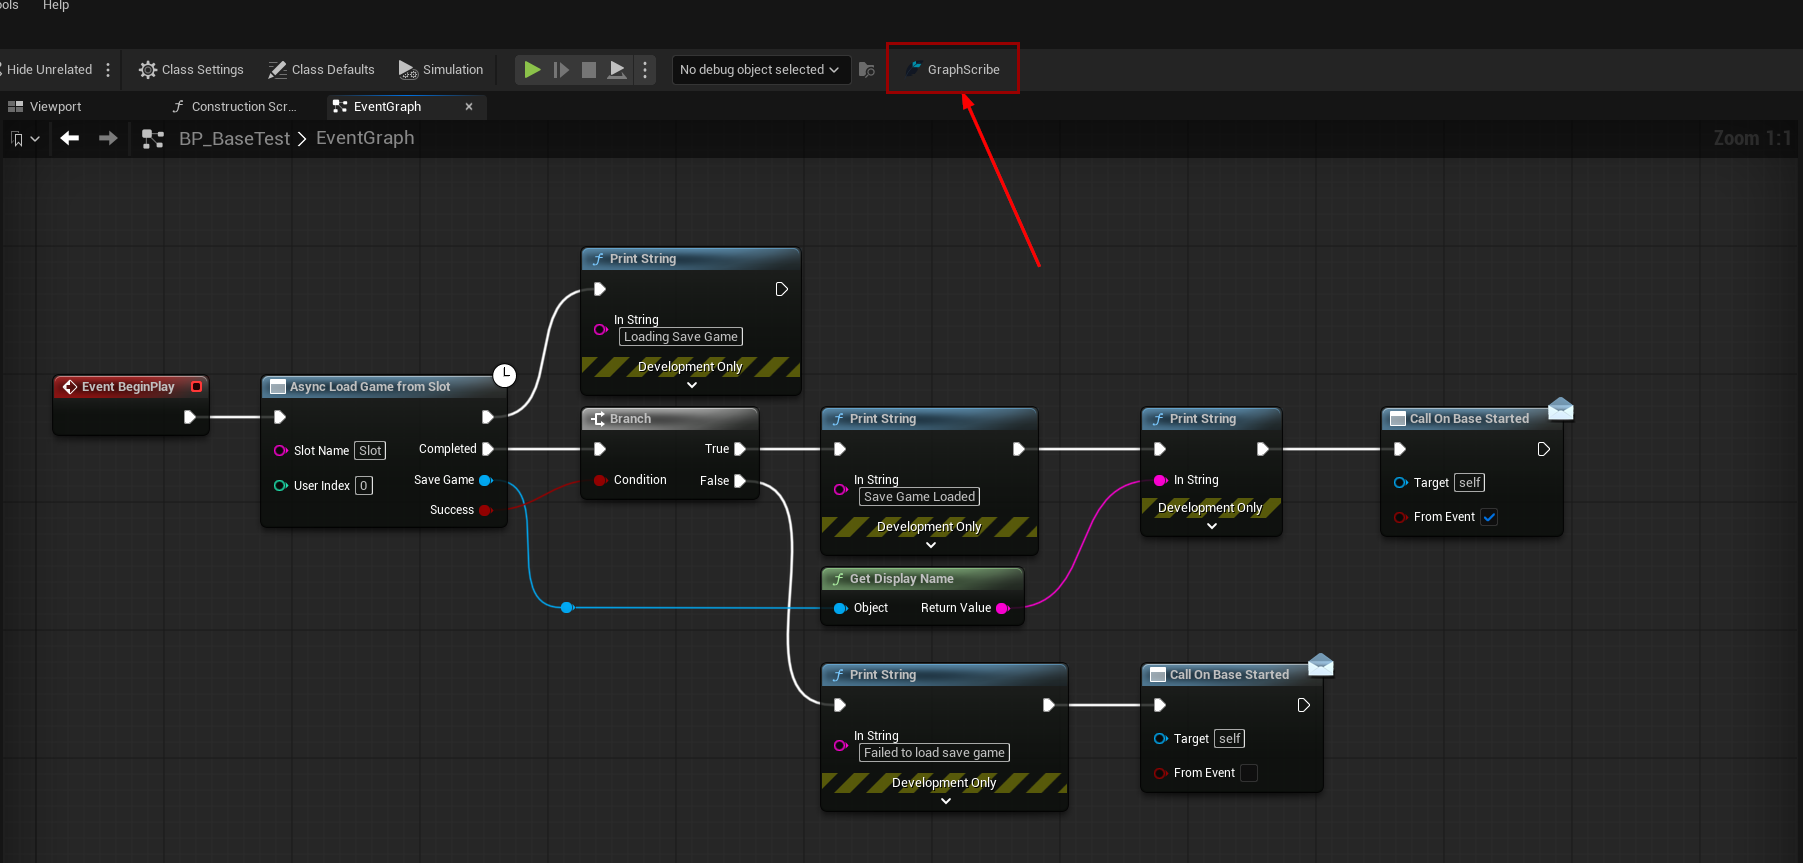
Open any Blueprint in your project (a Character, GameMode, Actor, or even a Widget Blueprint).
Step 2: Click GraphScribe and pick a format
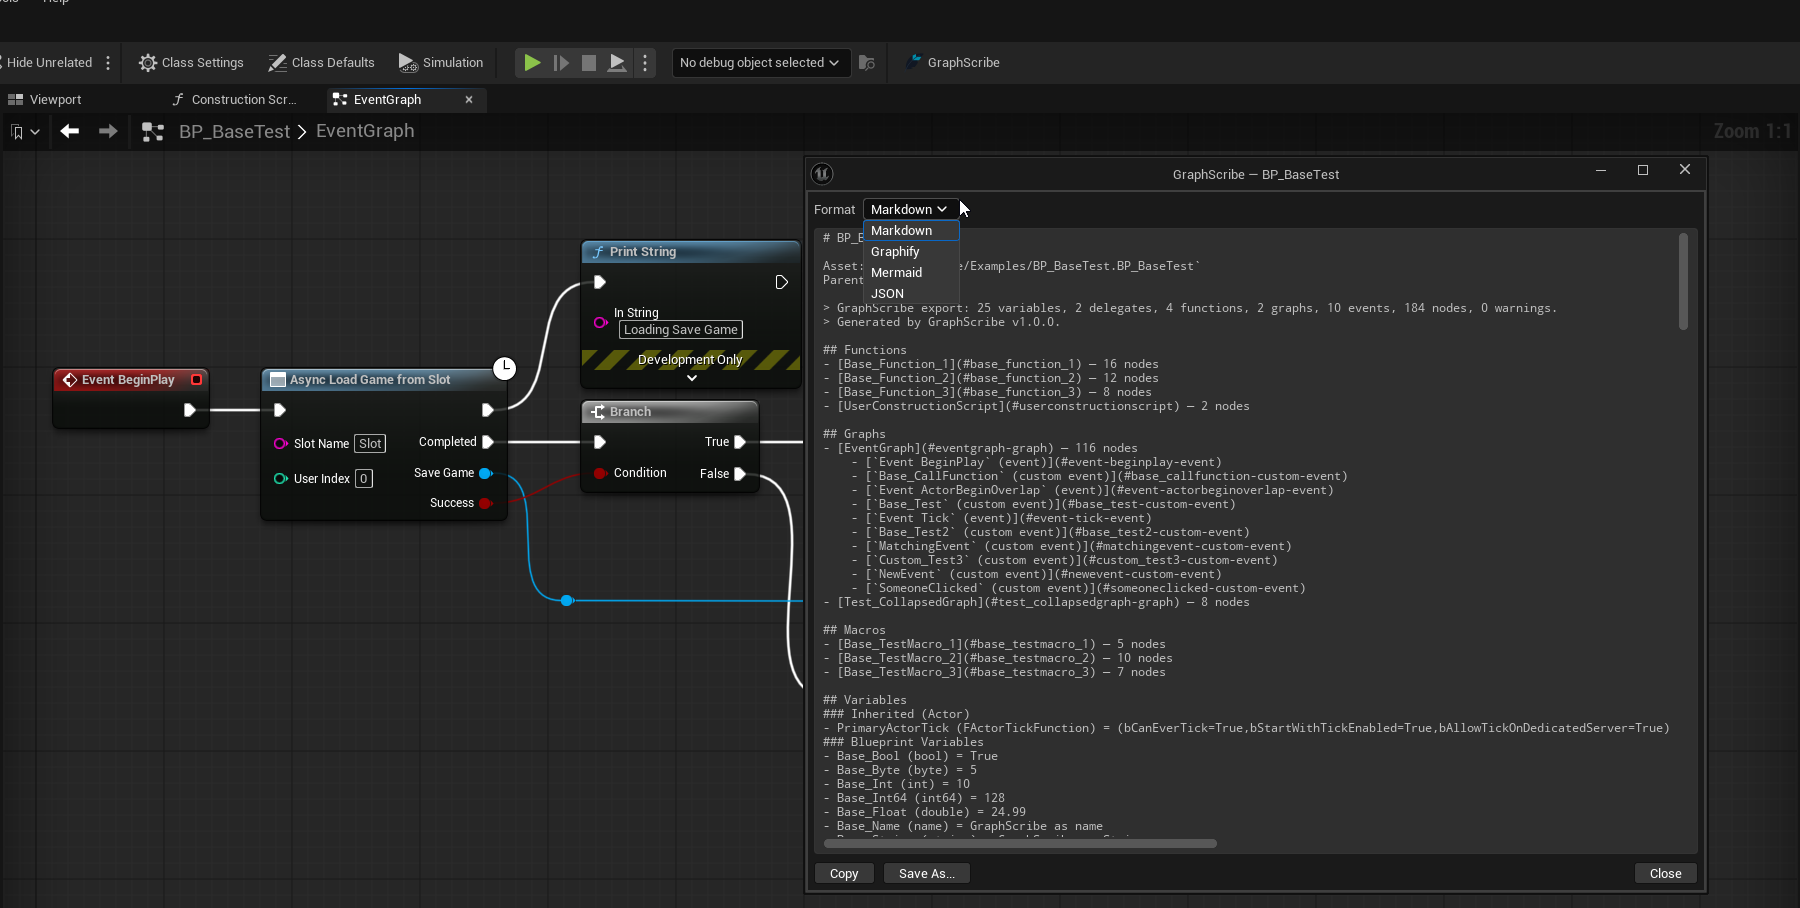
In the Blueprint editor, find the GraphScribe button in the toolbar and click it. An export dialog opens (titled GraphScribe — <Asset Name>) with a live preview of the export:
- Format: Markdown, Graphify, Mermaid, or JSON.
- Preview: a read-only view of the full export in the selected format, updated live.
- Copy: copies the export text to the clipboard.
- Save As...: writes the export to a file.
- Close: closes the dialog.
Step 3: Save your export
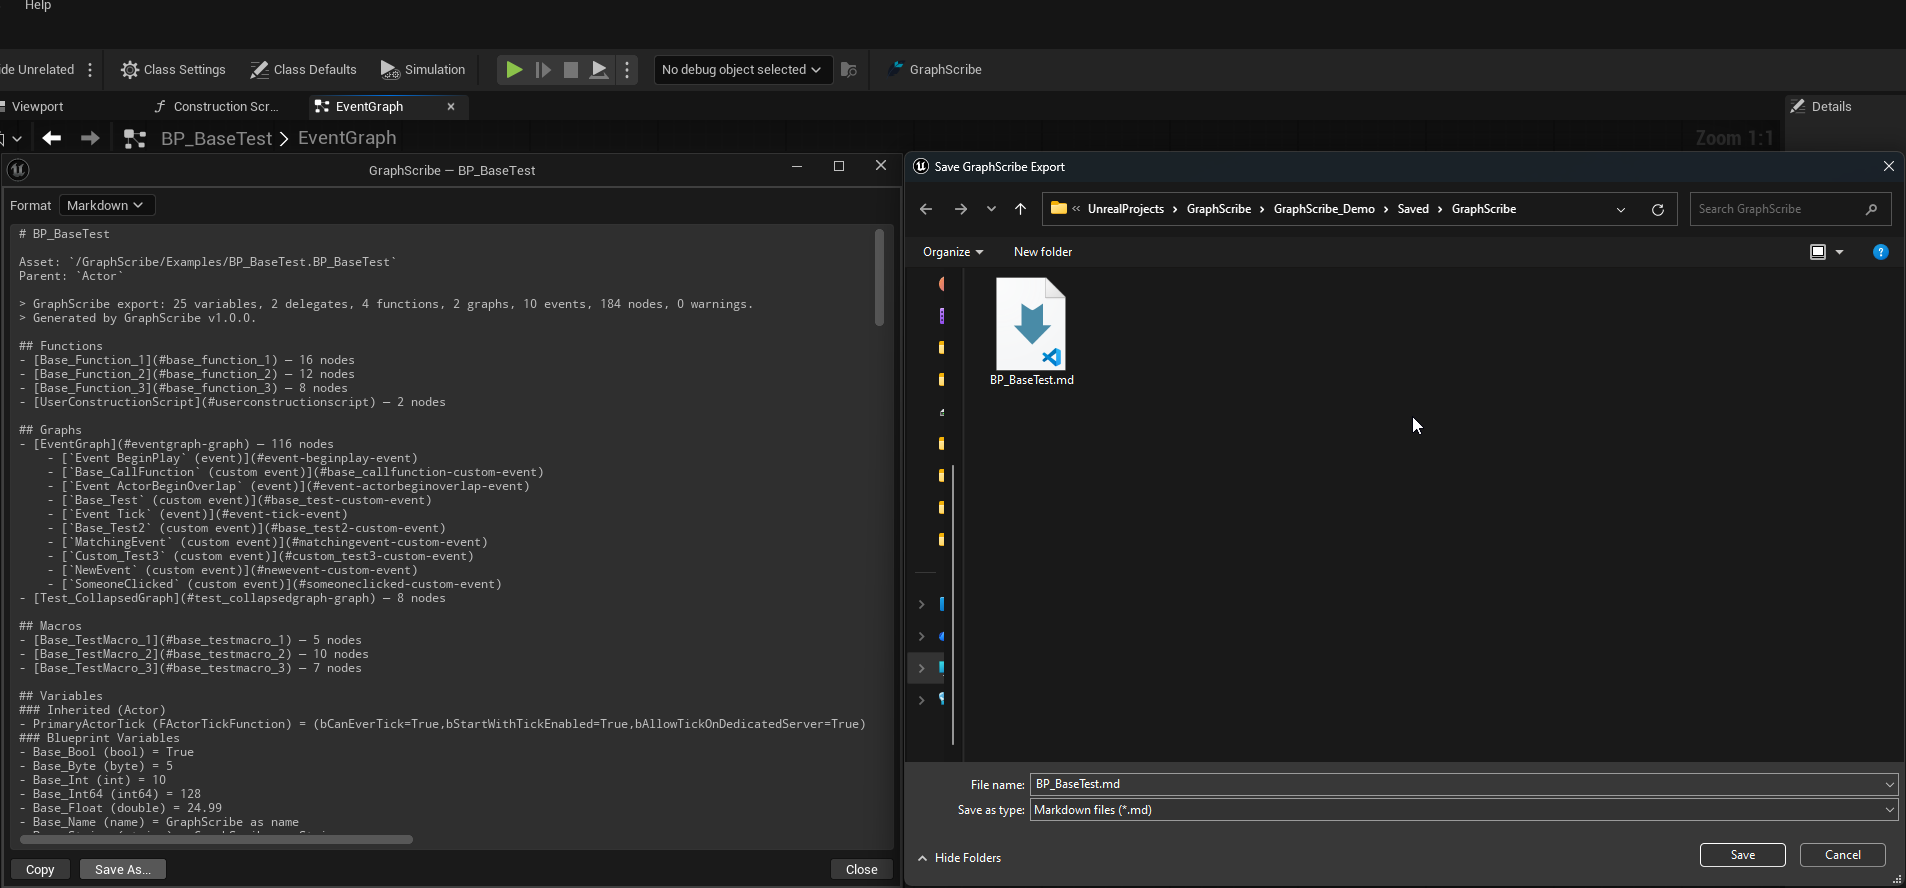
Click Save As. A system save dialog opens, pre-filled with your configured save directory and the asset name with the right extension:
.mdfor Markdown.graphify.jsonfor Graphify.mmdfor Mermaid.jsonfor JSON
Pick a location and confirm. If Open Folder After Save is enabled, the editor opens the file's folder for you.
Open the Markdown file and read it. Your Blueprint's variables, functions, and graphs are all plain text now, so anyone can read them.
What to try next
- Export a whole folder: Right-click a Content Browser folder → Export Blueprints with GraphScribe... exports every supported asset under it. See Ways to Export.
- Export selected nodes only: Select some nodes in a graph, right-click, and pick Export Selection with GraphScribe....
- Read your first export: Markdown Output explains every section you'll see.
- See the AI-ready version: Graphify: AI-Ready Graphs shows why the Graphify format is different from the others.